Faculty Database Integration with Barista
It's now easier to create directory pages in Barista with our integration with the Faculty Database. Instead of manually creating a Person Page for each faculty member, you can now import their data from the Faculty Database. Not only does this save time, but it keeps information accurate across several websites since it's coming from one source.
What is the Faculty Database?
The Faculty Database is where profile information on each School of Medicine faculty is stored and managed. Faculty (and their delegates) can maintain their profile through this database. The information from the database can then be viewed through other websites such as those on the Barista platform and School of Medicine Faculty Profiles.
How do I use the Faculty Database in Barista?
First, select Person Directory Page from the Create Content dropdown in the top black administration bar. Give your new directory a title and select your preferred layout options under Directory Settings.

The People to Display section is where you will manage information that pulls from the Faculty Database.
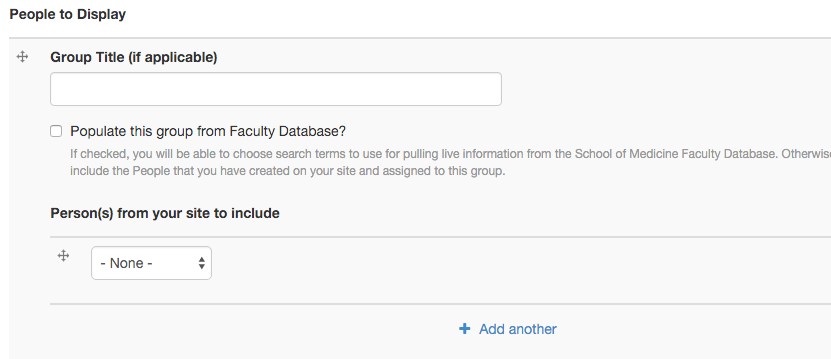
Group Title - This field is optional, but you can use it to group people on your directory into categories. For instance, if you wanted to separate primary and secondary faculty, you could name them accordingly here.
Populate this group from Faculty Database - Check this box to pull information from the Faculty Database. Once you check this box, you will be able to use search terms from the database to populate your directory. Learn more on this in the Populating from the Faculty Database section below.
Person(s) from your site to include - In this section you'll find a dropdown where you can select People Pages you've already created manually on your site. This is useful if you want to include people in your directory who are not in the Faculty Database. You must create the Person Page first, and then you can add them to your directory in this section. Select the blue "add another" option to continue to add manually-created person pages to your directory.
TIP To remove a person page from your directory, simply change their dropdown field to "none" and save the directory page.
IMPORTANT Manual sorting is not applicable to groups containing results from the Faculty Database. Manual sorting applies to directories containing only manually-created person pages.
Remove this directory group - This will delete the entire directory group from your directory page.
Add another directory group - This will add another directory group to your directory page.
Populating from the Faculty Database
Once you check the box to use the Faculty Database integration, you will see a few search options.
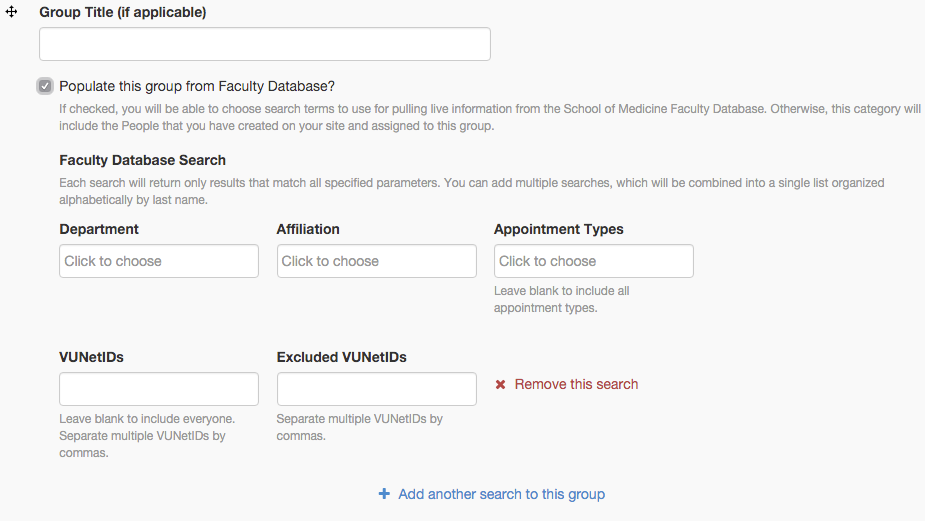
Department - This field is required. Choose the department from which you want to search for faculty. You can choose multiple departments at a time in this field. To remove a department, select the "x" next to the department name.
Affiliation - An affiliation is a group that can be made of faculty across several departments. For example, you may want to include faculty that are part of a center or program.
Appointment Types - Select the appointment type. Leave this field blank to include all appointment types. You can choose multiple appointment types at a time in this field. To remove an appointment type, select the "x" next to the appointment type name.
VUNetIDs - Enter the specific VUNetIDs of those faculty you want to include (if you don't want to include everyone). Leave this field blank if you want to include everyone. You can add multiple VUNetIDs at a time by separating the VUNetIDs with commas. Please note, the Faculty Database uses VUnetID, not VUMCnetID.
Excluded VUNetIDs - Enter the specific VUNetIDs of those faculty you want to exclude from the search. You can add multiple VUNetIDs at a time by separating the VUNetIDs with commas.
Remove this search - The red "x" at the end of the row of search fields will remove the search criteria.
Add another search to this group - This will add another search to your group.
What if information from the Faculty Database needs to be updated?
Faculty (and their delegates) can maintain their profile through the database. Faculty information from the Faculty Database cannot be updated through Barista. To update information, faculty can log in to the Faculty Database. Once logged in, faculty can assign delegates to access their profiles. Delegates will then have access to update that faculty member's information in the database.
What if I need to update my profile picture?
Faculty (and their delegates) can update their profile pictures through the Faculty Database. Profile pictures cannot be updated through Barista. Log in to the Faculty Database to update your profile picture.
What if I used to have access as a delegate, but I don’t anymore?
Faculty can assign individual delegates to their profiles by logging in to the Faculty Database. Once logged in, faculty can assign delegates to access their profiles.