Latest News from the Lab


Image Size Requirements in Barista

Barista has a few areas where images are scaled and cropped automatically. This can prove a bit tricky to get your images to look how you want, unless you know the minimum size requirements. As long as your images meet these requirements, you shouldn't have any trouble adding images to your website.

When placing an image, you should test your site at different sizes (e.g., on a mobile device or in a narrow browser window) as page widths adjust dynamically depending on the available width of the browser. Wondering why ideal sizes are so large? The larger size is used for high resolution displays, e.g., retina displays.

Slideshow Block

The slideshow block is designed to showcase landscape-oriented images, not portrait. Ideally, images for the full-width slideshow placed in the "Featured" region are at least 2016 x 850 pixels, but at minimum 1008 x 425 pixels. Images for the "homepage style" slideshow are ideally at least 1224 x 816 pixels, but at minimum 612 x 408 pixels. Other slideshow placements (full-width slideshows placed in the "Content" region) are also ideally at least 1224 x 816 pixels, but at minimum 612 x 408 pixels.

Directory / Person Page

Headshots should be 400 x 534 pixels at minimum. It's ok to use 200 x 267 pixels, but those images may not look good on retina displays.

Blog / Blog Post

Thumbnail Image The thumbnail image field has a fixed width of 150 pixels. This means if you upload an image larger than 150 pixels wide, it will shrink your image down to 150 pixels wide. If you upload an image smaller than 150 pixels wide, it will increase your image to 150 pixels wide and your image will appear blurry. It's best to use an image 150 pixels wide or larger. The length of your image can vary and will be adjusted to the width proportionally. 

Post Image The size of your image will be adjusted proportionally depending on if you have sidebar blocks showing on your post pages or not. For posts that show sidebar blocks, the post image will have a fixed width of 184 pixels. For posts that do not show sidebar blocks, the post image will have a fixed width of 296 pixels. For best image results, upload the largest size and it will be adjusted proportionally. The length of your image can vary.

Tips and Tricks for Adjusting Images

Editing Images Outside of Barista

If you have access to photo editing software, like Photoshop, it may be a good idea to adjust your images before you upload them into Barista. (If you don't have Photoshop, try searching the web for free alternatives for photo editing.) 

It's always good to keep the proportion of images in mind. For example, if you have a large headshot image, you could crop the image to the exact size needed (400 x 534 pixels). By cropping the image beforehand, you reduce the background area and can focus more on the actual headshot. If you uploaded a larger headshot, Barista will reduce the image, therefore keeping the large background area and it will make the headshot look smaller.

Adding White Space or a Clear Background

If you don't like the set sizes of some areas, you can work around them by adding white space or a clear background to your image before you upload it into Barista. For example, thumbnail images for the blog template are set at 150 pixels wide. If you feel the images at this size are too big, you can use the trick of adding white space to make them appear smaller.

First, you'll need to edit your image outside of Barista. Decrease the size of your original image to the size you prefer for the thumbnail. Next add white space (or better, a clear background) around your image that makes the image 150 pixels wide. (In Photoshop, this is done by increasing the canvas area.) Now when you upload that image into Barista, it won't get enlarged because it meets the minimum requirement, but will appear smaller due to the white space you added.

PRO TIP Never increase the size of an image or upload an image that is smaller than the minimum requirement. Doing either of these will blow up the image and make it appear blurry and pixelated. If you absolutely can't get a larger image, try the white space trick mentioned above so Barista won't automatically enlarge the image.

Vanderbilt News Feeds for RSS Reader Blocks

A great website not only has compelling images and original content, but also ever-changing content. You're more likely to increase your returning visitor rate by having content that is fresh and up-to-date. One way to do this is to create a blog on your site. This can be department news, VUMC news, or perhaps a specific area of medicine. The key to blogging is to do it consistently, so what if you don't have time? That's where the VUMC News feeds come in handy!

What are VUMC News feeds?

Did you know that content featured in VUMC News is tagged? Not only that, but each tag has its own feed! What does this mean for you? It means an ever-changing, updating stream of news that you can add to your website and it maintains itself. For those of you that don't have time (or enough content) to start a blog, you can still implement a news-style block on your website.

How do I find available feeds from VUMC News?

Lucky for us, VUMC News has a list of tags and their feeds. You can view this list at http://news.vumc.org/subscribe/available-feeds/ Most likely you'll find your department feed and probably a few other feeds that would make sense to show on your website.

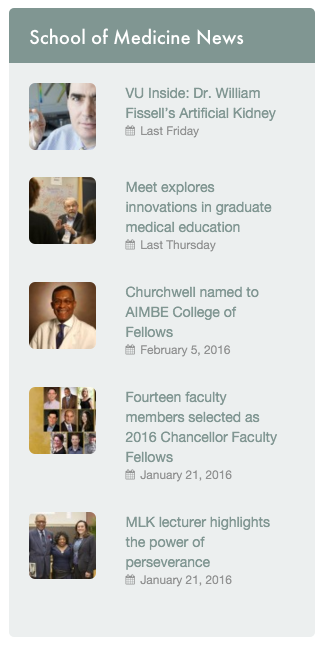
As an example, here is the School of Medicine listing.

SOMfeed.png


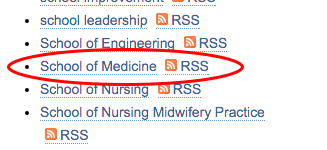
You'll find two links for every listing. The first link (in this case the text "School of Medicine") will take you to the page on VUMC News where you can view all the stories tagged School of Medicine, newest listed first. The link for this is http://news.vumc.org/tag/school-of-medicine/. Add "feed" to the end of this URL (http://news.vumc.org/tag/school-of-medicine/feed). This will be the link used to create an RSS block in Barista.

How do I create an RSS block using the Vanderbilt News feeds?

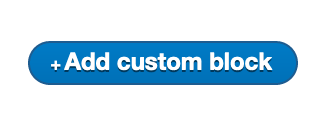
Now that you have your feed URL, you can create an RSS block. Select "Blocks" from the top black admin bar. Next select the blue "Add Custom Block" button.

addblock.png


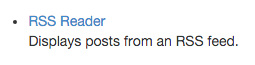
Select "RSS Reader" for the type of block.

RSSReader.png


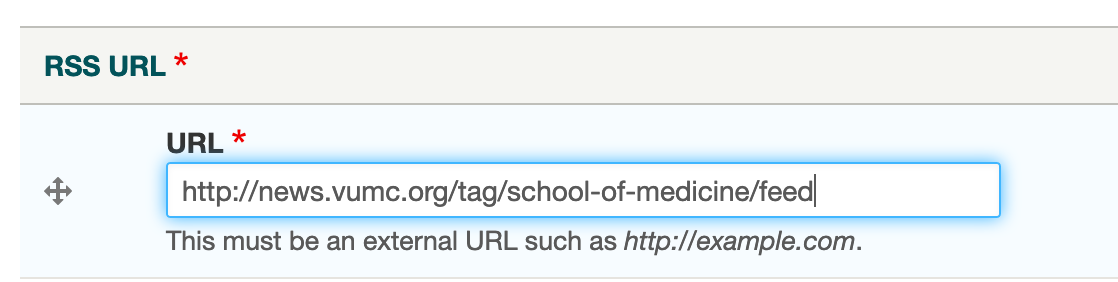
On the next screen will be your settings. Create a label to identify the block in your block listing. The title is optional, but can be something like "School of Medicine News." In the RSS URL field, you'll want to add your feed URL. You can add multiple feed URLs into one block and the feeds will be merged and sorted by date. Alternatively you can create multiple RSS blocks and display the feeds separately.

RssUrl.png


Select the rest of the block settings according to your preferences and save the block. Place the RSS block on a page by editing the desired page and checking the box next to your newly created RSS block.

exampleRSSblock.png


Now your site has a news area that will update automatically every time a new story is published with your specific tag. Easy to maintain and you're providing your readers with ever-changing, up-to-date content.