Teams can change the default audio/video settings if it detects something is no longer available. Join the meeting five minutes early so that you can fix any audio/video issues before the meeting starts. When you join a Teams meeting, be sure to check the following.
BEFORE MEETING
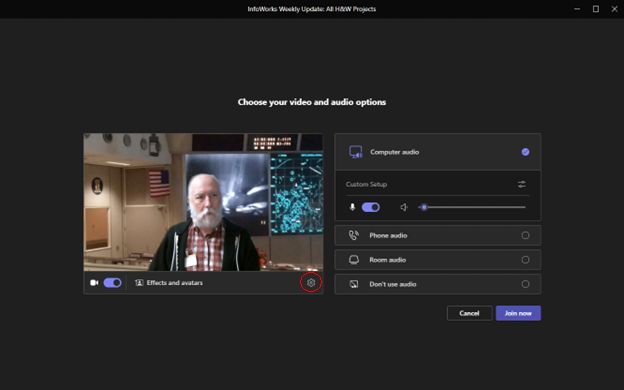
- Click the Join button a few minutes before your meeting is about to start. This screen will pop up:

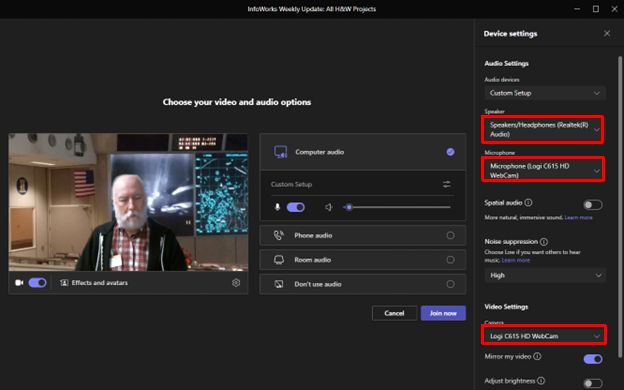
- Click the gear icon (in the red circle above). You’ll then see the Device settings on the right side.

- In the red highlighted boxes, make sure the speaker, microphone, and camera settings are set to the ones you want to use. If not, click the drop down in the respective section and change it to what you want to use.
If you’re using…
- …a headset, be sure to choose the headset for the speakers and microphone.
- ...external speakers, make sure to set those as your speaker.
- …a laptop with the screen closed, check the microphone to make sure it’s not using the laptop’s build in microphone.
- …a laptop with the screen closed, also check the camera to make sure it’s not using the laptop’s built-in camera.
AFTER MEETING HAS STARTED AND YOU’VE JOINED
If you enter a meeting and have audio/video issues, follow these steps:
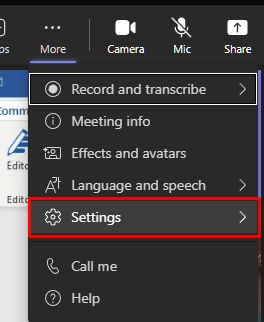
- Click the More menu at the top.

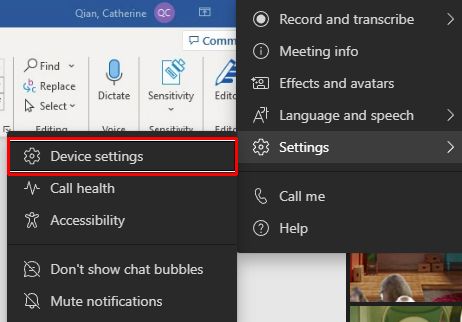
- In the drop down that appears, click Settings.

- Then click Device Settings.

- After this, you’ll see the Device settings screen on the right. This is the same screen as in step 2 in the BEFORE MEETING section above. Follow those steps to check and change your audio/video settings.